用片元着色器实现阳光下的齿轮?那么我们一起实现下吧
#define NUM 15.
float rect(vec2 p, vec2 size) {
    return max(smoothstep(size.x, size.x+0.01, abs(p.x)),
        smoothstep(size.y, size.y+0.01, abs(p.y)));

}

mat2 rotate2D(float theta) {
    float s = sin(theta);
    float c = cos(theta);
	return mat2(s, -c,
               	c, s
               );

}

float gear(vec2 p, float r, float angle) {
    float res = 1.;
    for(float i = 1.; i <= NUM; i++) {
    	float currAngle = i/NUM * 2. * PI;
        vec2 rp = rotate2D(currAngle+angle) * p;
        rp.y -= r;
        res *= rect(rp, vec2(0.05, 0.06));
    }
    res *= smoothstep(r, r+0.01, length(p)) + smoothstep(0.11,0.1, length(p));
    return res;

}

void mainImage( out vec4 fragColor, in vec2 fragCoord )
{
    // Normalized pixel coordinates
    vec2 uv = 3.*(fragCoord-0.5*iResolution.xy)/iResolution.y;
	vec2 glowUv = uv - vec2(2.*sin(iTime),1.);
    vec3 col = vec3(1.,0.5,0.25);
	float over = 1./length(glowUv);
    float dist = pow(over, 0.8);
    col *= dist;

    col = 1. - exp(-col);

    float v1 = gear(uv, 0.5, iTime * 0.5);
    float v2 = gear(uv - vec2(0.72,0.8), 0.5, -iTime * 0.5);
    float v = min(v1 , v2);
    // Output to screen
    fragColor = vec4(col*v,1.0);
}
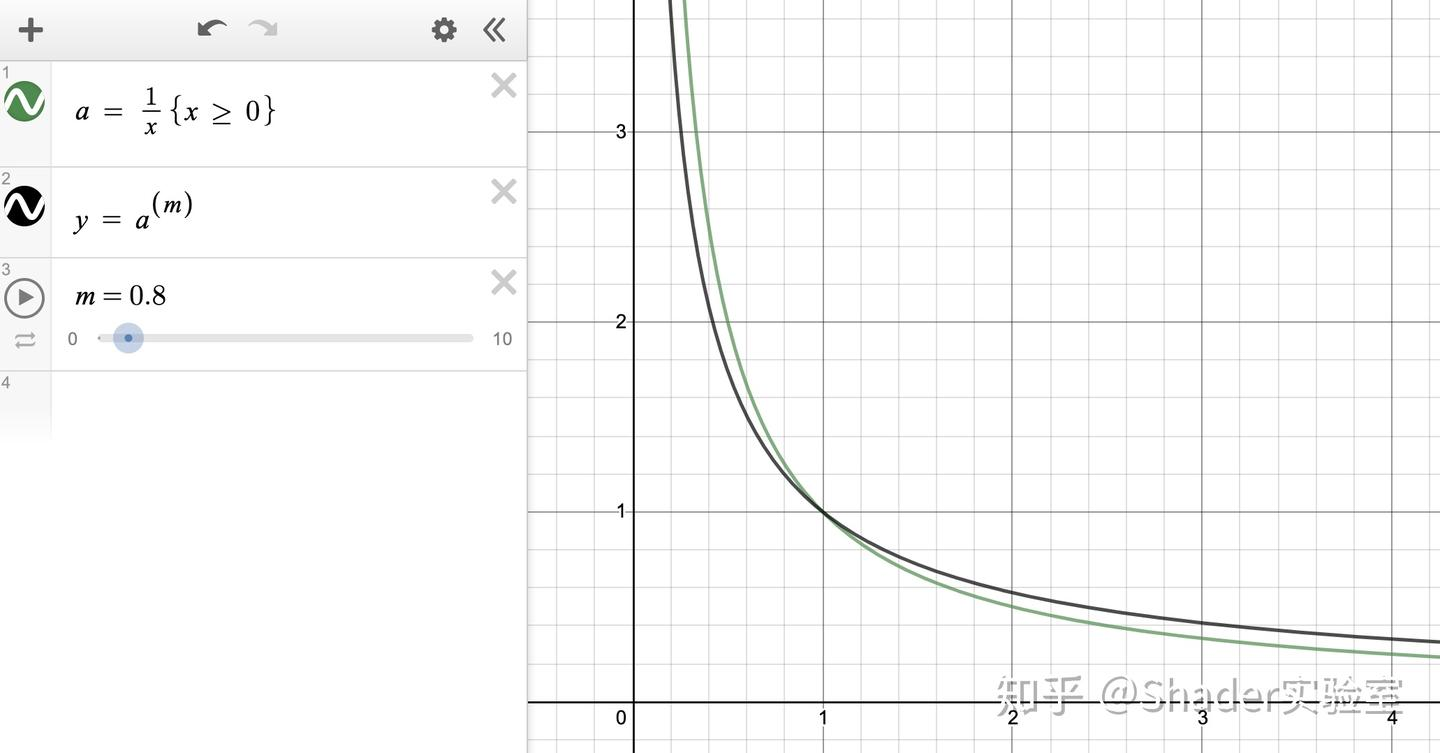
首先讲解下如何实现太阳辉光:
float over = 1./length(glowUv);
float dist = pow(over, 0.8);
col *= dist;
col = 1. - exp(-col);
根据上述代码可作图如下:
颜色与dist进行运算后,其结果作为exp运算的源数据,得出的结果如下图:
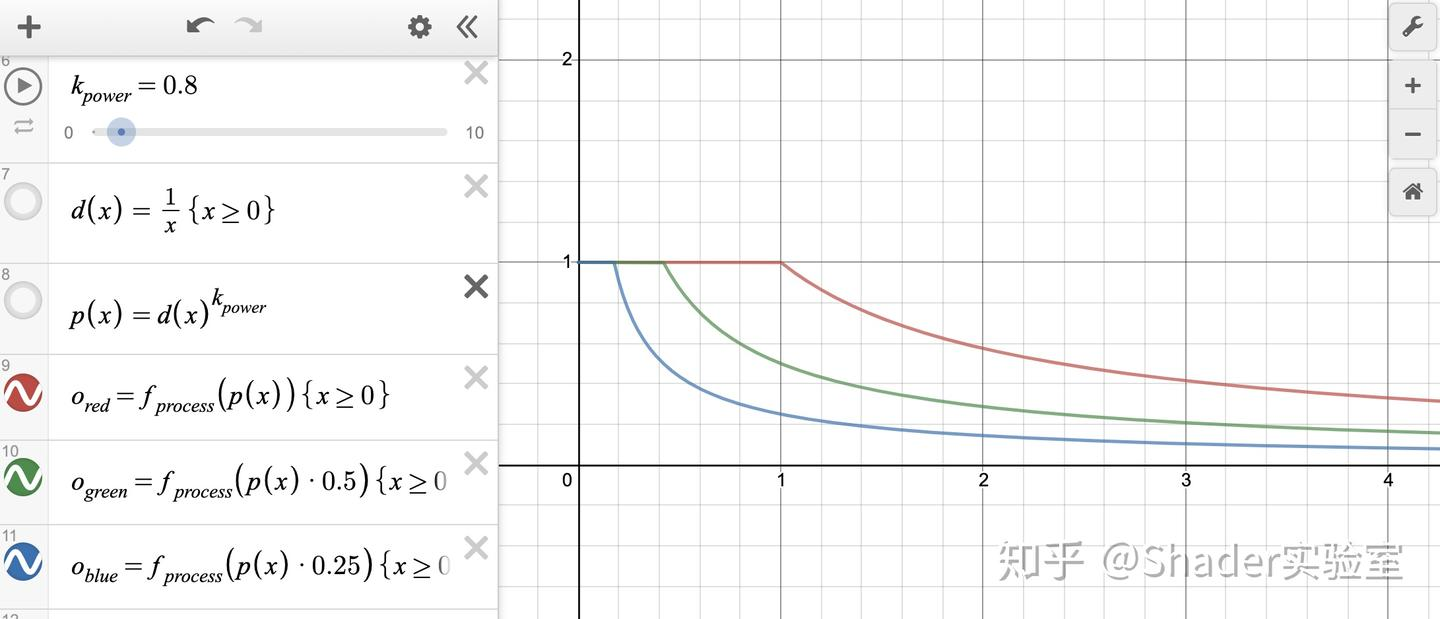
glow效果的实现方法就是上述图片中所呈现的方式。
齿轮效果的实现也很简单:
float gear(vec2 p, float r, float angle) {
float res = 1.;
for(float i = 1.; i <= NUM; i++) {
        float currAngle = i/NUM * 2. * PI;
        vec2 rp = rotate2D(currAngle+angle) * p;
        rp.y -= r;
        res *= rect(rp, vec2(0.05, 0.06));
 }
 res *= smoothstep(r, r+0.01, length(p)) + smoothstep(0.11,0.1, length(p));
 return res;
}
NUM定义了齿轮的数量,每运行一次for循环就旋转坐标系i/NUM * 2. * PI的弧度,然后移动坐标原点到(0, r)的位置,在该位置画一个矩形作为齿,代码:
smoothstep(r, r+0.01, length(p)) + smoothstep(0.11,0.1, length(p));
述代码定义了齿轮的主体与中心,关于smoothstep的详细解释可扫描二维码关注公众号: