smoothstep可以用来生成0到1的平滑过渡值,它也叫平滑阶梯函数

上图演示的是通过smoothstep产生的距离场(Distance Field)效果,它是smoothstep函数的一个简单实现,同样smoothstep也符合重映射(可查阅Shader实验室: remap函数)的定义。
原理
smoothstep公式定义如下(通过源码分析):
float smoothstep(float t1, float t2, float x) {
  // Scale, bias and saturate x to 0..1 range
  // 还记得么?在remap算法中接触过
  x = clamp((x - t1) / (t2 - t1), 0.0, 1.0);
  // Evaluate polynomial
  return x * x * (3 - 2 * x);
}
根据上式,我们找些数字代入,假设 t1 = -2,t2 = 3:
y = (x - (-2)) / (3 - (-2)) 。且 result = y * y * (3 - 2 * y)。
x还是取两个特殊值,分别为-2,3;
当x=-2,y=0,result = 0;
当x=3,y=1,result = 1;
此时可以作图如下:
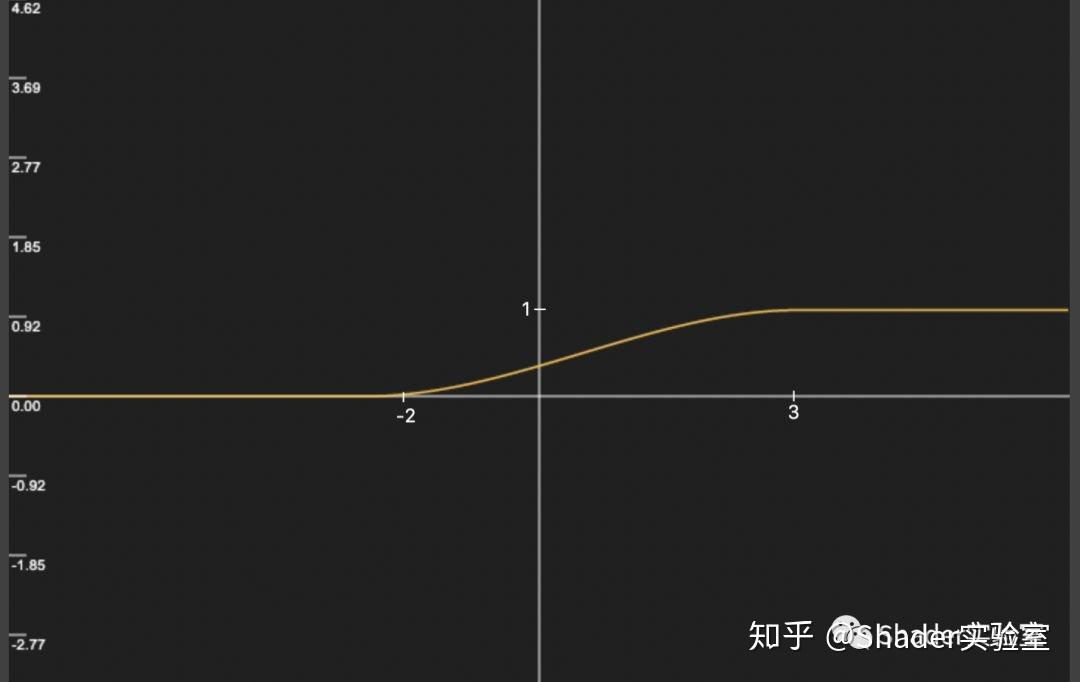
可以看出,x在 t1 到 t2 值的范围内变化曲线由缓到快再到缓的过程,并且我们可以得出结论:
当x等于t1时,结果值为0;
当x等于t2时,结果值为1;
(ps: 值限制在0~1之间的原因是因为clamp函数的限制)
为了验证得出的结论并有个与结论对应的效果,我们交换t1与t2的值,也就是此时t1 = 3,t2 = -2,作图如下:
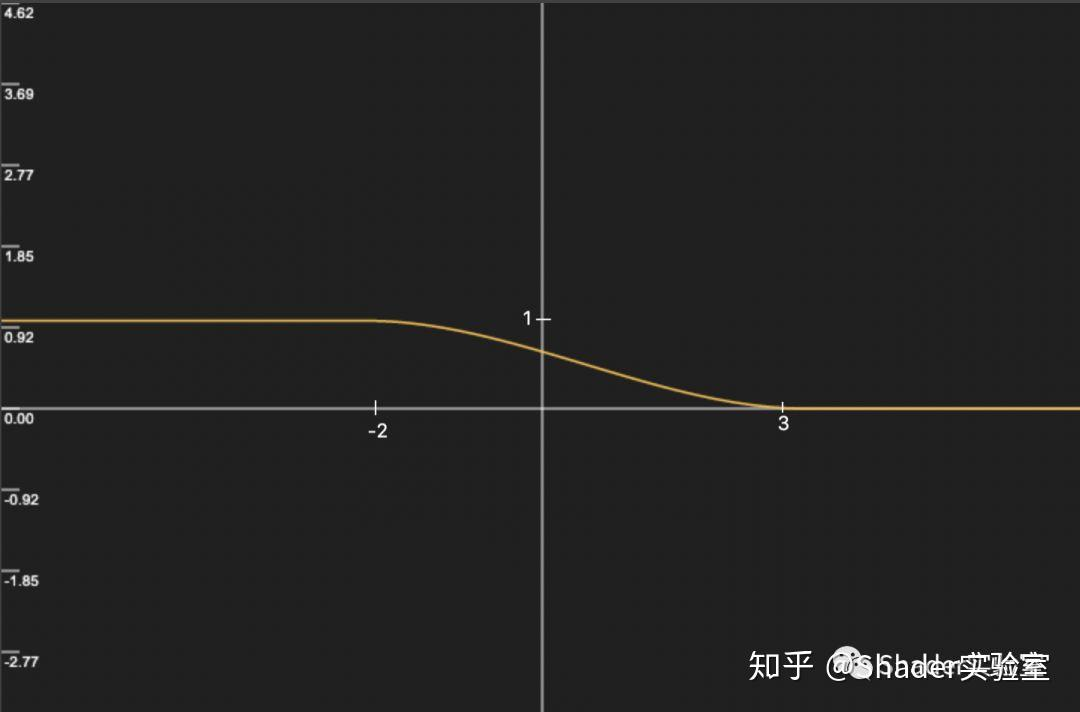
结合图像可知:
当x = t1 = 3时,结果值为0;
当x = t2 = -2时,结果值为1;
它再次验证了我们的结论,并且t1与t2值的位置也显得尤为重要,它决定了曲线变化的走向,请大家一定要记住该结论,并将它结合到我们的实际开发中。
我们已经分析了smoothstep函数的内部实现与原理,那么有一个问题不知道大家是否想过,假设有两个smoothstep函数(参数t1值都小于t2值),第二个smoothstep的t1值正好等于第一个smoothstep的t2值,并且两个smoothstep进行了相减操作,结果会如何:
假设第一个为:smoothstep(1, 2, x);
第二个为:smoothstep(2, 3, x);
作图如下:
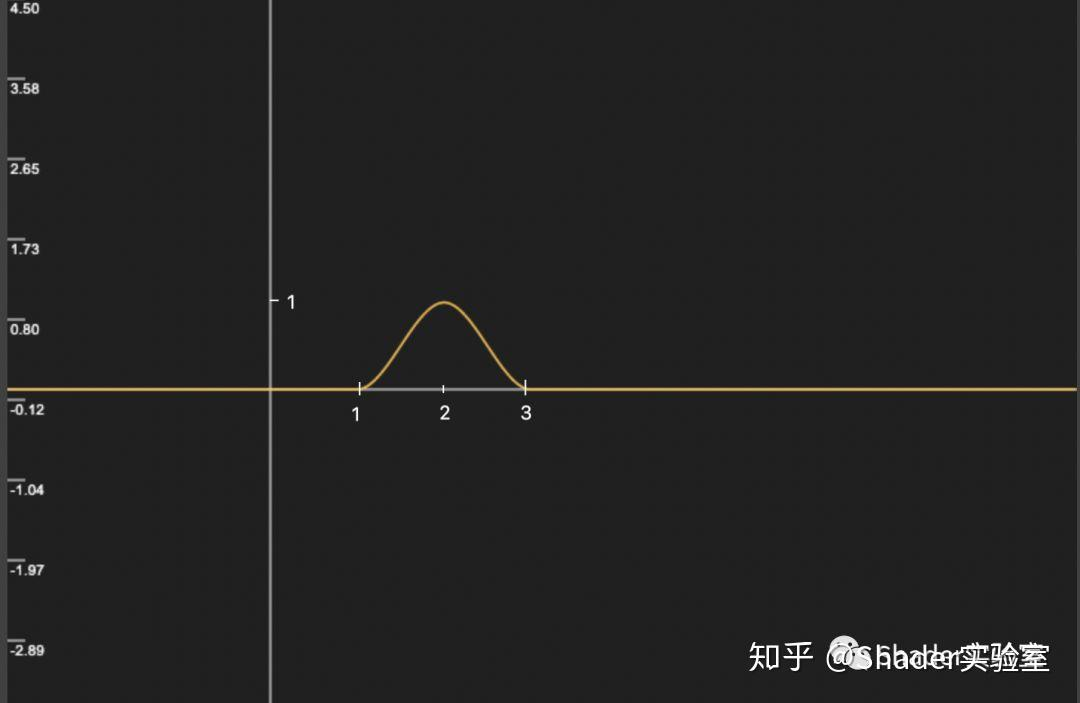
根据结果可知,示例中的两个smoothstep进行相减操作时,在x的值为2时达到了峰值,并会往两边递减。
那如果我们把第二个smoothstep改为:
smoothstep(3, 4, x)结果又会如何呢?
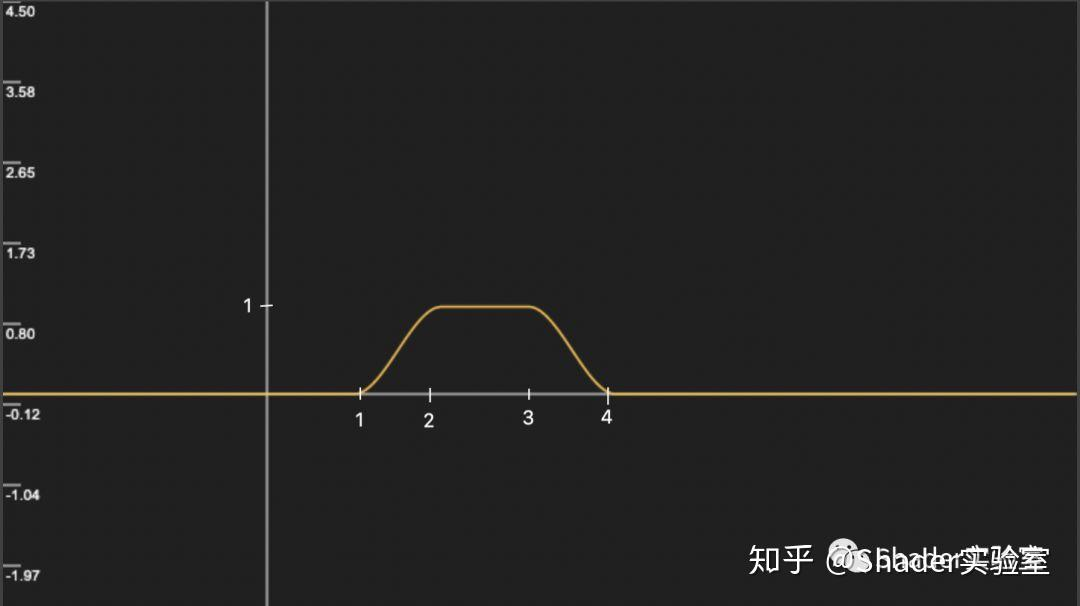
同样的,峰值依旧会在第一个smoothstep中的t2值与第二个smoothstep中的t1值之间产生,并随之会往两边递减。
这也是我们在开发中经常会直接用到的结论,在实验部分我们也会用这个结论做一个圆环效果。
实验
-
新建Unlit Shader与Material。
-
打开Unlit Shader文件,并修改frag函数:
fixed4 frag (v2f i) : SV_Target
{
// 先把uv坐标原点从左下角移至中心位置
// 通过length计算点(uv.x,uv.y)到原点的距离
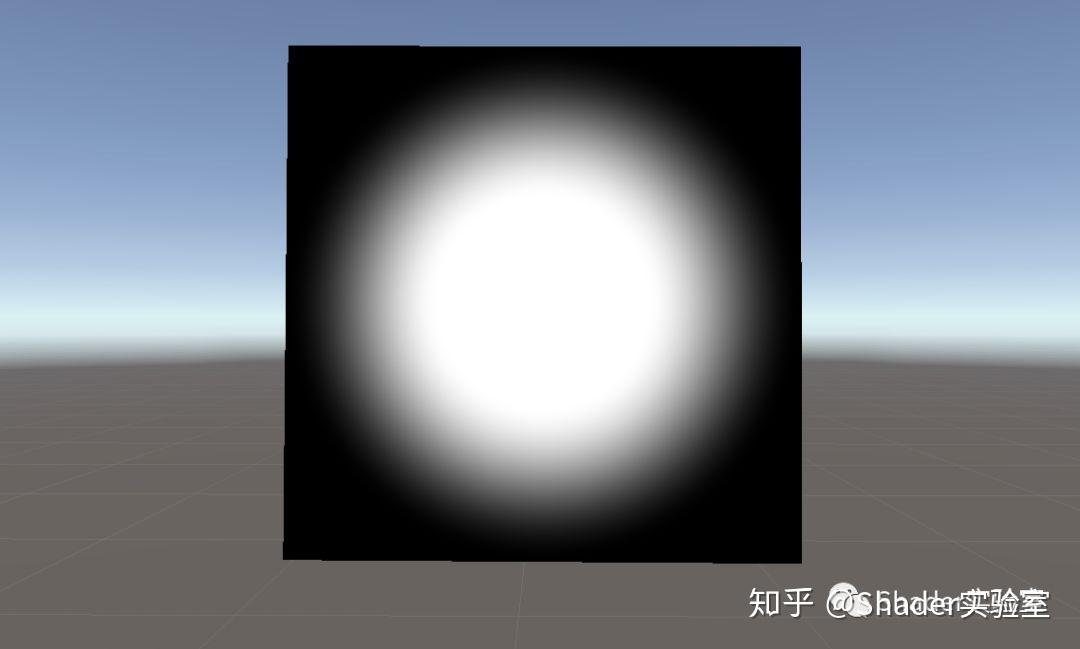
// x大于等于t1=0.5时,结果为0
// x小于等于t2=0.2时,结果为1
return smoothstep(0.5, 0.2, length(i.uv - 0.5));
}
3.呈现的效果如下:
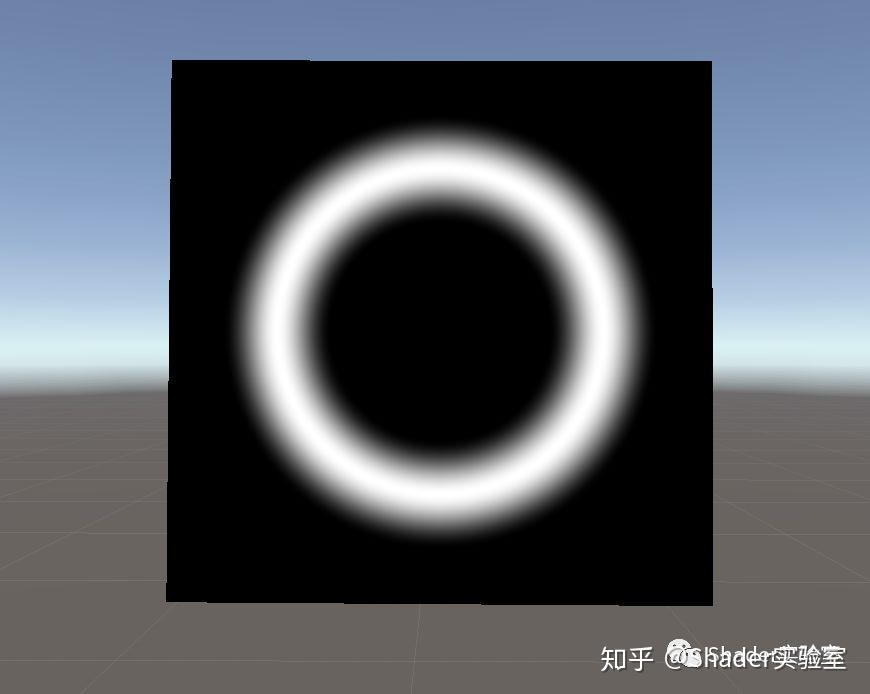
- 实现圆环,修改frag代码如下:
fixed4 frag (v2f i) : SV_Target
{
    half l = length(i.uv - 0.5);
    float s1 = smoothstep(0.2, 0.3, l);
    float s2 = smoothstep(0.3, 0.4, l);
    return s1 - s2;
}
- 最终效果。
对Shader开发感兴趣的话,可一起关注下面的二维码噢。